Monday, May 12, 2014

'You Only Think You're Close' No Longer Applies -- Looking back on the last few weeks

So much has happened in the last few weeks around the shop and with my projects. It's hard to know where to start, since there was just no time to write about any of it as it was happening.

So I think I'll just touch on a few of the highlights and share some pictures since people seem to like that.

In a recent post I wrote about the challenge of joining the chair arms to the back legs, which come up to form the back of the chair. That was tricky, and I thought of it as what we would call the ‘crux’ in climbing – essentially the hardest part of the route.

Turns out I was wrong. After the arms were landed, it was time to move on to the backsplats a crest rail. I’ll post a pic to show what that looks like, but essentially there are six joints that all have to land at once. And they’re tricky joints, with angles and curves. And when you adjust one with a file or plane or chisel, it inevitably throws the others out of whack – even if they were perfect a moment ago.

That, it turns out, was the crux. But I got through it. I laughed a couple times, thinking back to two months ago when I was gluing up major components and feeling pretty proud of myself and David, one of our instructors, walked by. He must have detected a bit of a swagger as I stood back eyeballing my chairs. He said: “You only think you’re close.” And he was right, of course.

Anyhow. I landed the backsplats and the crest rails, and I moved on to the seemingly endless list of next steps. Finishing the shaping, steaming out dings and dents, applying finish.

And finally, when that was all done, and I could stand back and be satisfied, it was time to move onto something new – weaving the seats!

After debating back and forth for a while, I decided to stick with the tried and true standard, Danish cord. I figured out the weave pattern I wanted, researched the technique, and even mocked up a practice seat to work on before I started with the real thing.

Once I figured it out, it was a meditative, mellow process. And they tied the chairs together, Literally, haha. Really though, the before and after was amazing.

Since then it’s been a whirlwind of preparing for the open house, having half the town attend the event, then preparing for the Highlight Gallery show, launching that show with a formal reception on Saturday, and finally seeing all our work in one place being enjoyed by many. So cool.

There was one cool moment for me at the Highlight show, when Tina and Britta Krenov (James Krenov's widow), got excited when they saw my chairs, which as I've mentioned before were designed by Vidar Malmsten, a close friend of JK's. They've had a set in their house for years, and still do, just as strong and pretty as when they were build 40 or 50 years ago.

Ok, more later, but here are some pictures of all the stuff I just talked about!
Gluing up the backsplats, which lock into the lumbar rail and crest rail, which is dowelled into the top of the legs. Lots of things need to line up just right for this to work. But when you get it... so sweet.

I made a mock-up seat to practice weaving the Danish cord. Here it is.

One of the biggest challenges with the Danish cord was just figuring out how to start. Where to place the L-shaped nails, etc. I figured it out eventually but it took a while.

The real thing. These are the front-to-back 'warp' strands. Next, the side-to-side, over under, 'weavers' are installed. One thing I learned: Don't draw ever strand completely tight. Leave slack. It will tighten on it's own as you move along. Otherwise the tension builds and builds and the chair can actually implode. It's been known to happen.

Boom! Finished. And I think they look pretty darn good. I've been told the arm chair looks like an 'old man chair.' Does anyone else think that? I think it's crazy talk, personally.


At the Highlight Gallery, next to Jess Osserman's caned chair.

Hey! Vidar next to Al Martini's distinguished looking desk. Nice combination.


Wednesday, April 30, 2014

Why You Should Never Wear Loose Clothes Around a Big Jointer: A Cautionary Tale

A CR alumnus came by the shop the other day. He's now a professional woodworker who lives in the area.

He was carrying a paper bag. He rang the bell in the centre of the benchroom (that's what we do when we need to get everyone's attention for an announcement) and said he wanted to tell us a story about what can happen when you aren't careful in the shop.

He had been working, wearing a baggy "crappy $1 t-shirt from the second-hand store," running planks over the jointer.

He said he thought about putting on his shop apron, but didn't want to stop and just kept working, contrary to his instincts.

The next thing he knew, he was being pulled into the exposed jointer blade (a vortex of spinning razor sharp blades made to chew through wood) and it was all he could do to do a push-up on the machine's table to stay away from the danger.

The entire shirt was ripped from his body, save for the cuff of one sleeve.

"And....I will admit I was listening to music," he told us a little sheepishly. As a result he couldn't hear his machine when it first grabbed the fabric.

In the end, he was fine. The shirt wasn't. As pictured below, it was a shredded mess. Scary to think what could have happened if he was wearing a more durable T-shirt.

Lesson learned.

Monday, April 7, 2014

Just a Quick Update on Vidar's Progress

Things have been coming along with my chairs and I'm on schedule to finish by my May 5 deadline.

You might remember that one chair has arms, the other does not. I wanted to mix it up a little.

I had been warned that the arms are one of the most difficult aspects of the chair, and I found that to be true last week and this week. Shaping the arms wasn't hard. Mortising the arms wasn't hard. Doweling the arms wasn't hard.

Fitting the arms to the back of the chair, however, was somewhat nightmarish.

Ok it wasn't that bad, but it was a challenge. The back legs of the chair, which come up to form the back rest, are pillowed on the front -- right where the arms connect. That means the arms themselves have to be concave, and curved, and angled, and tapered, to perfectly fit the mating surface.

Achieving this fit requires a round bottom rasp, gouges, double stick tape and sandpaper, and a lot of trial and error. But I finally nailed it and glued up today.

It was one of those glue ups where you walk away with a completely clear conscience knowing you didn't have to cheat at all to get the joint to close up just right. No crazy clamp pressure, no twisting or filling gaps with glue. It just worked. Beautiful.

Here are some pictures:
Here is the chair dry-fit and ready to go.
Close of up the nightmarish joint.
And here is the chair all clamped up!

Sunday, March 30, 2014

'Shiny Shit Sells' and Other Pearls of Wisdom From The Workshop


Josh Smith presents a bench to classmates at the College of the Redwoods Fine Woodworking program
You hear these little nuggets around the shop from time to time, whether in a lecture, a ‘walk-around’ or just in conversation.
And some of them are just begging to be written down and shared.
I guess the journalist in me is still alive and well because I always have to record them. 
And now I think I’ll share them with you all.
Enjoy!

“I have a friend who is a contractor. He makes money. I have a friend who is a cabinetmaker. He makes money. I am an artisan.” – Ejler Hjorth-Westh
“I used to make money, then I came to this school.” – Ejler
“When you walk into a room that is full of loudness, it is the quiet piece that gives you refuge. A loud piece essentially says ‘stay away.’” – Ejler
“Learn to love the 1%. People are lovable everywhere.” – Ejler
“I see the beauty of the wood, but I still want it to be what I want it to be.” – Ejler during a lecture on applying finishes
‘Seek the inner beauty of the wood, and be wary of overly vulgar glassiness, which is a real temptation.” – Ejler
“Shiny shit sells.” - Ejler
“It’s easy to measure a gap. You can’t put a measurement on taking a risk and a successful project,” – David Welter quoting Krenov
“The entire time the thought of carving out that seat scared me the most. So that’s where I started.” – Welter
“Krenov used to always say there’s no ego in this work. But there was never a more willful man that walked this Earth. That always puzzled me.” – Welter
“The piece reflects the attitude in which it was created.” – Welter
“As JK said: Hand tools give us the fingerprint on the work. Machines give us the accuracy, the precision.” – Yeung Chan
“Overcoming what you already believe – I think that is part of the learning process.” – Tim, while presenting his table to classmates
“A curve should be like a blade of grass in the wind. Where it is thin it bends a little more and there is motion and movement.” – Welter describing Krenov’s view on curved lines in a cabinet.
“There’s a tendency to confuse sharpness with exactness.” – Welter
‘Death alone can prevent you from making mistakes.” – Krenov
“It’s fun. It’s those little touches that takes this work a cut above the others.” – Jim Budlong on why we make handmade catches and latches
“It became more important for the cabinet to be beautiful. And in the end people will put into it what goes into it.” – JK on a student debating whether to make a cabinet 5’ deep or 7’
“When does something rich, ample and voluminous become just fat?” – Krenov
“You can’t have too much wood. It’s impossible. Unless you don’t plan on living long.” – Krenov
“He saw it, and it wasn’t. He saw it again, and it was.” – Krenov describing an incident where Malmsten told a student something wasn’t quite right, then came back after lunch and thought it was perfect (though nothing had changed).
“A chair is a negative imprint of the body. When it is empty, there you were a little while ago. It’s a lovely thing.” – Ejler
“Sometimes it is the absence of a person in the chair that actually makes the chair. And we must recognize that a chair sits empty most of its life.” – Ejler
“Your chair won’t last forever but it needs to last forever enough.” – Ejler
“It’s good to work cheap, once in a while, for the right reasons.” - Ejler
“Sometimes almost perfect is perfect enough.” – Laura Mays
“Let’s keep this school going. It’s the last thing in the world that means anything. It’s all going to shit.” Brian Newell

Sunday, March 16, 2014

How Ripping Something Apart Then Putting it Back Together Can Make it Stronger


We’ve learned a number of different techniques for bending wood, each method with its own strengths and weaknesses and contexts and purposes.
There’s coopering, which can be done one of two ways. You can either plane a curve into a solid piece of wood, or you can cut a solid piece into staves, bevel an angle on the edge of each one, then rejoin the staves together to create a faceted curve which can then be planed smooth.
Then there is steam bending, which is often used in chair making.
Another method involves the veneering of thin sheets, or plys, of wood on top of one another in alternating grain directions, over a form to create a bent core, which is then laminated with a shop-sawn veneer to create a beautiful outer surface.
You can also simply saw a curve out of solid wood when thick enough stock is available.
But recently I’ve been experimenting with bent laminating – a technique used often in chair making.
I had no pictures of my bent lam, so here is one courtesy of thecraftsmanspath.com showing a rocking-chair rocker glue-up.
Here’s how it works: You saw a piece of solid wood into thin strips (we call this 're-sawing'), then run them across a jointer or through a planer to remove the saw marks.
Then, using a form you created that mimics the curve you want to achieve, you re-assemble those layers in their original order, apply glue to the joining surfaces, bend the whole unit around the form and clamp up like crazy!
Because the wood is sawn into such thin strips, it is able to form curves that the solid piece probably never would. 
A few hours after the glue up you remove the clamps and presto, you have a piece bent to the curve you need, ready to be shaped into a chair or table leg, arm or crest rail without the waste that would have occurred if you’d sawn it from solid wood.
To steam bend it, you would have to subject the wood to heat, water and steam, running the risk of over stressing the wood and causing breakage.
But with bent lamination there is very little waste, incredible bends can be achieved, and the wood, once re-assembled, often shows little or no evidence that is has been cut into slices and glued back together again.
I used the technique to create the lumbar rails on my chairs and the process has gotten me thinking about parallels in my own life.
I resonate with the concept of something that is whole, complete, strong and integral, being dismantled into smaller, weaker pieces. That happened to me as it happens to many of us -- the result of circumstances, life, mistake and brokenness. It was life.
But the point is that though the dismantling, the cutting up, was painful and unexpected and resulted in weakness, strength was able to come out of it.
The individual pieces were shaped, smoothed, and prepared through that process for future work.
And once they were put back together again, some imperfections were removed, strength and integrity were added and the end result, I hope, is a piece that is stronger than it was before that process began.
And the process didn’t just add strength it also provided new traits. Like the re-sawn wood, I can now bend in new directions that pride and ego and stubbornness simply wouldn’t allow before.
In high school I worked out in the weight room almost every day, desperately trying to not be the skinny, gangly 10th grader I was. A teacher who worked out with us and helped with our routines and described weight-lifting as the process of tearing, breaking and damaging your muscles a little bit every time you lifted a dumbbell. You were forcing those muscle fibres to grow back stronger, to knit together more closely. Strength and muscle were the result of that process.
I think what I’m describing here is the same process but it’s not the muscles that are growing back stronger, it’s the heart. With wood, the dismantling, re-shaping and re-assembly results in a stronger piece in a brand new shape.
I think, I hope, that somehow that same process has taken place in my heart.

Thursday, March 13, 2014

Hickory bark vs. Danish cord -- what do you think looks better?

As you might recall, I'm building two chairs this semester (scroll down a couple of blogs to see a pic or click here and go to the bottom.)

The process is coming along and I'm now working on connecting the glued-up fronts and backs of the chairs, with seat rails and stretchers. This is what they currently look like:
I'm starting to think about the type of seat material I want to use, and I'm looking at two main options: Danish cord and hickory bark, and I need your input.

Danish cord is a paper based product used in many Danish or Scandinavian chair designs. It's durable and sustainable and has a low-key, subtle look that draws attention to the furniture, not the seat.

Hickory bark (also called 'splint') is also sustainable, subtle, and arguably could better compliment the wood of the chair frame, since it is also made from wood. It is typically used on 'country chairs' in the Shaker, or Windsor style but also occasionally in Danish-type designs - though not commonly.

I like them both. Ben, a second-year student who built the Vidar chairs last year, used Danish cord and it looks great. I'm considering hickory because it's a small way to put my fingerprint on the design and make it my own.

One other thing to consider: Ben's chairs are oak, which is quite brown, and he used white Danish cord. My chairs are ash, which is much lighter than oak, and the splint would be brown, which would mean the colour scheme from Ben's chairs would be reversed on mine. Which could be kind of cool.

Enough talk, here are the options. Would love your feedback!

Here is Danish cord on a chair by Caleb James (http://kapeldesigns.blogspot.com/)
Here is a stool with hickory splint seat by Brian Boggs (http://www.brianboggschairmakers.com/category/chairmakers_journal/)

Saturday, March 1, 2014

Video: How to make the Vidar's Chair crest-rail (with a surprise ending)

I've been working away on my Vidar's chairs and making good progress. Yesterday was a good day, as I glued up the backs of both chairs -- the first glue-up in this build. Pretty exciting! Next I need to make the crest rails and the back splats. The crest rail construction process is pretty complicated and difficult to explain, so I put together this little video after successfully cutting one out yesterday.
Check it out!

Sunday, February 9, 2014

A conversation with James Krenov's daughter


James Krenov is pictured here as a child in Alaska, floating one of the toy boats that launched his woodworking endeavors.
On Friday night I was selling tickets and helping manage the food table at the formal reception for our College of the Redwoods fine woodworking winter exhibition.
It was packed with people and the event seemed to be a big success.
A lady was purchasing a ticket from me, and while filling it out, she joked “with a last name like mine, I should have a good shot at winning, right?” Not surprisingly, her name was Krenov. It was Tina, Jim’s daughter, making her annual visit to check up on her dad’s legacy.
‘Which piece is yours?’ she asked me.
‘It’s the mahogany pipe cabinet with the spalted live-edge panels,’ I replied. And then I paused for a second. ‘Actually... do you want to hear a story about it?’
‘Definitely!’
So I told her how I had inherited my grandfather’s pipes years ago, and had always wanted to build a cabinet to display them. A couple of years ago, when I finally got serious about doing it, I started doing some research. One of the books I came across was James Krenov’s ‘A Cabinet-Maker’s Notebook.’
I’ve written about this book before and about the huge influence it had on my decision to come to the College of the Redwoods.
Well, in that book among the examples of JK’s work, was a pipe cabinet he had built for a client out of English brown oak.
When I eventually applied to CR, got in, and started considering what my first project would be, it just seemed right to decide to finally build the pipe cabinet, as inspired by Krenov himself.
I felt a little silly about blabbing so much of my story to a stranger, but she seemed genuinely glad to have heard the story, and I was glad I got to share.
The end.

Friday, January 24, 2014

Finishing strong and starting all over again...and again

It’s been an interesting few weeks for me around the wood shop leading up to the Christmas break and since we returned earlier this month.
In terms of my cabinet, I met my goals before the holidays: everything completed except for a few small details – mostly related to hardware and the fit of the doors, and cleaning up a few scuffs and scratches.
And a week into this semester I had those details taken care of and was able to present the final product to the class! Here it is:

After that I started thinking about my next project. We’ve been introduced to the technique of veneering, so that was an option, another cabinet was also possible, maybe on a stand, or I could build a chair. There were lots of options, and some of my classmates were racing ahead, mocking-up their ideas, choosing wood, while I was poring through books and photos, trying to get inspired.
I went through a bunch of ideas, but nothing really grabbed me until I saw two different settees – one a Shaker style with turned legs and stretchers, the other inspired by Shaker craftsmanship but more of a modern piece.
I came up with a sketch that combined elements of both into one piece, and suddenly I was inspired and ready to get to work! Here's my drawing: 
But then, as things often go, I was told that the wood I wanted to use wouldn’t work, and that the piece was probably too ambitious for me, and it would be difficult to complete it on deadline, and that I should reconsider – my instructors thought a bench would be a workable compromise.
Back to the drawing board. Literally. I sat down and started sketching – partly to clear my head, and partly to try and find some inspiration. Here are some of the random drawings I did: 

Then my instructor Laura suggested I might be interested in building something called Vidar’s Chair. The piece was designed and built by Vidar Malmsten (son of Carl Malmsten and a friend of James Krenov). He actually completed the piece in Krenov’s shop after bringing it over on the back of his bicycle. More about that later.
Laura’s reasoning was that it would allow me to still build a ‘sitting object,’ but since we have plans for the chair, and the instructors are very familiar with it, it would be more achievable than the settee. I wouldn’t have to start from scratch, coming up with drawings and a design from nothing more than a photograph, but could work from the plans and draw on other’s knowledge.
Ben, a second year student who built a pair of Vidar’s chair’s last year, was also encouraging and said the project gave him the skills he needed to build the beautiful settee he did this year.

So, I pulled the trigger and am building a pair of these chairs. One with arms, and one without. I spent the last couple of days making templates, getting familiar with the chair and building a form to bend the back stretcher. And I’m heading to Santa Rosa on Monday to buy the wood I need. Boom. This is happening. Here’s what my drawings look like… 
And here are Ben's chairs from last year. So sweet... 

Sunday, December 15, 2013

Let go, wind, and the pain (and joy) of deadlines


I heard it said last night that in woodworking, when you think you’re 90 per cent done, you have 90 per cent of the work still left to do.  That proved to be true the past couple of weeks.
Myself and other students have been putting in crazy hours to try and finish up all the details by the holidays (which started yesterday).
I knew I had a lot of work to do, so I decided my goal was to have the doors hung on my cabinet, the back panel glued in, the drawers fit and all the necessary repairs and clean up completed to the outside.
That would leave just door handles and drawer pulls, and making racks to hold the pipes, which will be on display in the cabinet. But I was okay with leaving those tasks until after the holidays. The real deadline is Feb 1, when our pieces will be on display in the mid-winter exhibition, so there will be some time to finish up in January.
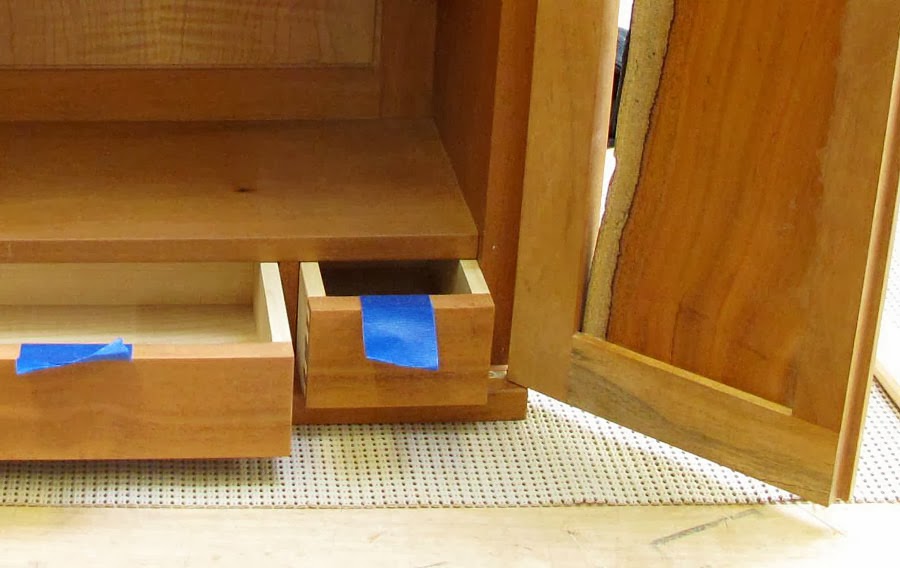
Fitting a couple of drawers so they open smoothly and stop where they’re supposed to, hanging doors so they swing open evenly and close with a gentle click – these are things that sound simple. But they aren’t, of course.
Drawers, built to be slightly larger than their pocket, needed to be planed down and formed into a subtle wedge-shape, so they come to a smooth stop just before falling out – something we call ‘let go.' That took about three solid days.
The doors, also slightly too large (they were the first part of the cabinet I made, months ago) needed to be cut down until they fit into the cabinet, then hinge mortises needed to be cut, and the hinges positioned delicately and carefully until the doors work just right.
And in that process, I discovered one of the doors had ‘wind’ -- essentially, it had twisted slightly at some point and no longer made a perfect fit with its mate. So that had to be fixed.
But finally, after working until almost midnight Friday, and scrambling Saturday morning to finish up some final details, I was able to check off the doors, drawers, back panel, and even had time to fix some dings and scratches in the finish of the cabinet.
Yes there are parts that are still incomplete, but the vast majority is done and I met my goals and can go home for the holidays at peace with my project – which for the first time, actually looks like a real thing.
It also looks beautiful – something I tend to forget in the long days and weeks and months of toiling over one piece that eventually begins to feel like a collection of mistakes and fixes. But last night, with the cabinet sitting on my bench during our woodshop Christmas party, I couldn’t help but be reminded that it is a beautiful thing, made from precious wood, that has sentimental value and will stay with me hopefully for the rest of my life.


Tuesday, November 12, 2013

What James Krenov and Farley Mowat Have in Common


Last week we were shown a slideshow encompassing most of the pieces James Krenov made while working as an instructor at our school, over a period of 20 years or so.
The cabinets ranged from his traditional display cases mounted on stands, to some more wild and experimental pieces he made later in his career. David Welter explained how they were made and some of the thinking that went into the design and construction process.
But one of the photos was different, just an image of Krenov reading to the class from a book.
Photo courtesy of JamesKrenov.com (photo credit goes to David Welter)
It was explained to us that the book was “Sun, Sand and Stars,” the memoir of Antoine de Saint-Exupery, the French pilot and author who wrote “The Little Prince.”
Each year, David said, Krenov would read a passage where Saint-Exupery describes how he and the other pilots stationed with him in North Africa would keep an eye on the lanterns in their tents for signs of an approaching sand storm.
If new species of insects began to appear around the lamps at night, they knew they were being driven by a weather system coming towards the area, and to prepare for a storm.
Krenov used the passage to illustrate how we need to be aware of our environment, our materials and tools, and to learn to really see the changes taking place around us in order to become skilled, sensitive woodworkers.
I liked the story, and as a big fan of “The Little Prince” it inspired me to find Saint-Exupery’s memoir and read more.
The story also reminded me of the words of advice given to me by Farley Mowat, a legendary Canadian writer and environmentalist famous for writing about Canada’s Arctic people.
In the early 2000s I interviewed Farley because he happened to live in the small town where I worked as a newspaper reporter, and one of his short stories had been turned into a film called “The Snow Walker.”
It’s a story about a brash young bush pilot who only cares about himself and his machine, until he crashes in the Barrenlands in the company of a young Inuit girl, and has to rely on her to survive the harsh environment.
We talked about the movie, the book, Farley’s role, and then sat down to have a whiskey and cranberry juice along with Ted, the paper’s photographer.
Farley turned the tables, and asked me what was going on in my life. I told him it just so happened that I was about to head to Morocco for a year to volunteer with a Christian organization working in the region.
Farley, in his mid-80s at the time, almost jumped out of his seat: “You need to learn the lessons of The Snow Walker! You can’t go over there thinking you can teach people and change them and make their lives better until you understand them, their environment, and live alongside them!”
It was great advice and sparked a conversation about the nature of that type of work and the importance of being tuned into the things around you, the value of paying attention, seeing and feeling and being open to learn – things I now know James Krenov also valued, though in a slightly different context.
 In the end, I guess the goal for both Mowat and Krenov was the same. By being tuned into their surroundings, by always being willing to learn new things and become a student – they believed that their work, their lives, their interactions, became better as a result.
The fact that both of them produced incredible work right up until old age (Farley is still going strong), is one more reason to be inspired by their way of looking at the world.
At the end of David’s slide show, he said “and I thought you might like to see the real thing,” and casually brought out a Krenov cabinet – the first many of us had ever seen. It’s in the photo below…

Monday, November 4, 2013

In Woodworking it all Hinges on the Little Things


It seems I’ve been spending all my time and energy dealing with little things recently -- seemingly insignificant, unimportant challenges or problems that end up taking days or even a week to solve.

I recently wrote about the troubles I had getting the ‘wind’ out of my cabinet doors and ensuring they fit snugly against the sides with no rattle or gaps.

Then I moved on to hinges, and spent another week struggling -- cutting small pieces of brass, drilling and counter-sinking, pressing steel pins into the hinge leafs and striving for a smooth swivel action on a perfect 90* axis.
Bet these hinges don't look like they took 4 days to make. Or that they're garbage, But they did, and they are.

Those hinges finally got the OK (after an embarrassing number of botched sets), and this morning I started the week with a new task – making a ‘map’ of my cabinet and the doors in order to figure out exactly where the hinges will go, to ensure the doors swing open smoothly and close tightly.

Such a simple-sounding task, yet so crucial and fraught with so many potential errors. To minimize the chance of mistakes, we create a full-scale paper plan of the cabinet, complete with swinging cardstock to represent the doors, to find out where the pivot points need to be.

Once that relationship is established, we make a spacer that ensures all four hinges are set at the same distance from the sides. And finally we mark and cut the mortises for the hinges. My classmate Henry cut 30 test mortises on scrap wood before he felt comfortable enough to cut into his cabinet – it’s that tricky.

I don’t want to lose you in the details (if I haven’t already) but the point is that these little details add up. The reason it takes hours, days, or sometimes a week to accomplish something so simple, is that it needs to be done just right or the cabinet won’t be right.

And so, if it takes a week to make four simple brass hinges (that are made properly and work the way they should), that’s ok.

I wrote that as if I believe it, but I’m not sure I do just yet.

I still have that git-er-done mentality that fools me constantly into thinking I’m a failure and woodworking isn’t for me because I’m so painfully slow, and my mistakes are so glaring (at least to me), and I can’t simply Git. ‘Er. Done as I can in other areas of my life.

But there’s a quote by Samuel Johnson on the wall at the front of our workshop that I find myself turning to more and more in those moments of self-doubt. It says: “What we hope ever to do with ease, we must first learn to do with diligence.”

I’ve been taking comfort in those words and the truth they represent. Difficult tasks eventually become easier, but only after a lot of effort, pain, and even failure.

I’ve been trying to remind myself of that when I struggle through a hard week of seemingly constant failures, what I’m actually doing is learning “to do with diligence” the things that will hopefully, possibly, some day come with ease.
Finally, hand-made hinges that will work the way they're meant to!


Friday, October 25, 2013

Stepping Back to Move Forward

I woke up at 4 am this morning out of a deep sleep, wide awake with an idea about how I could solve the latest problem with the cabinet I’m building.
The waking-up thing has happened a few times this week, but usually it’s been accompanied by an anxious ‘what am I going to do’ kind of feeling – and without the answers.
The week has been stressful, as I’ve spent almost all of it trying to chase out a gap where the doors will meet the cabinet sides. It feels silly to write and it probably feels that way to read as well. It was just a small gap – in a place that will have a gap anyway when the doors and hinges are actually installed.
But I want everything to be as close to perfect as possible in this piece, and a weird mystery gap just isn’t acceptable.
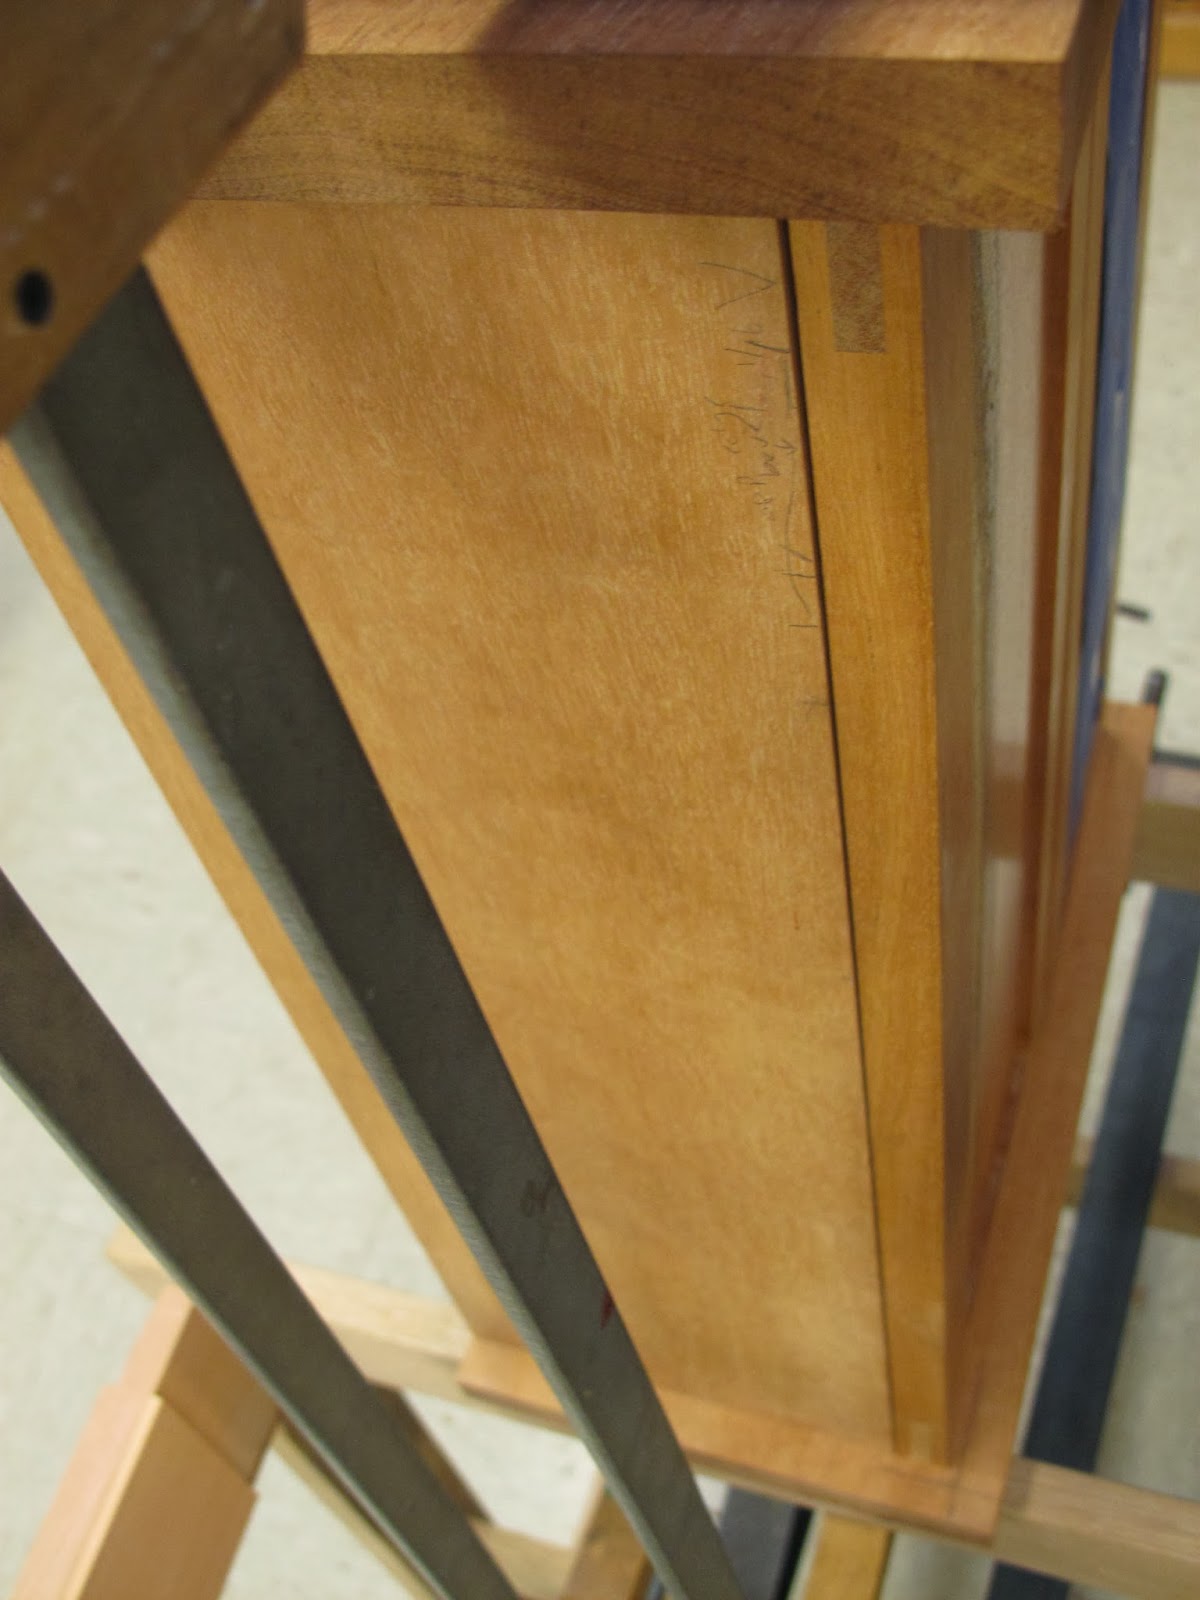
Photo shows the gap between the door and the cabinet side.
In a perfect world, the sides of the cabinet would be flat and square, and the doors would be flat and square, and everything would come together tight and gap-free. But that wasn’t happening for me.
I spent four straight days scraping a little here, sanding a little there, planning over here, and by the end of day Thursday the thing looked worse than it did on Monday morning. I was trying to sculpt two imperfect pieces of wood together and it just wasn’t working.
My epiphany at 4 am was this: Take a step back. Flatten the doors and the cabinet sides, essentially taking them back to where the started, and see what happens.
Funnily enough, my bench mate Jim had the same idea this morning, and so did Laura, my instructor.
So I did it. Four days of work down the drain, but when I reset all those edges, and made one additional adjustment, they came together as tight and perfect as I could have hoped.
No more gap!

And I was happy, and could go to Elephants (Friday night beers around the woodshop bonfire) with a clear conscience and an accomplishment to actually celebrate.
It’s strange, this type of work. Small, seemingly insignificant challenges can occupy days of work and can cause all kinds of stress. But when you get there, when you finally figure it out and are able to move on, it’s incredibly rewarding – and you learn so much in the process.
I may have only got one thing done this week, but I know I learned lessons that will stay with me for years to come. And I’m one step closer to a finished cabinet.


Thursday, October 10, 2013

How a Bad Day Resulted in Prettier and Better Cabinet Doors

Last Saturday was a bad day.
I had spent a few days working on the panels for the two doors that would enclose the front of the cabinet I'm building, and would therefore be the centrepiece of the whole project. The doors would be built first, then the rest of the cabinet built around them, so they had to be just right.
I had chosen to use mahogany that was spalted – a type of fungal disease that attacks trees, but often leaves them with beautiful and unusual patterns and colours.
But the problem was that part of the spalted edge, which would comprise part of a ‘live-edge’ component of my cabinet doors, was also slightly worm-eaten and a little rotten.
I had thought I could work with it and live with the worm holes, and that the uniqueness of it would make up for any structural issues in the wood.
But then on Friday, as I was cutting a profile into the edge of the panels, the corner of one ripped off, its lack of structural integrity causing weakness in the wood.
Here are the original panels, with one broken corner visible in the top left.

I was able to re-attach the broken corner and salvage the piece, and was pretty happy with the repair job -- the fixed fracture was almost invisible.
Then on Saturday, as I was shellacking my panels, the second piece slipped out of my hands and landed on the floor, the weak corner exploding into a million pieces.
Bad way to end the week.
I went home, tried to forget about the disaster, and enjoyed Sunday away from the workshop, though in the back of my mind the wheels were turning as to how I could resolve the conundrum.
By Monday I had made up my mind. I bought a new piece of mahogany first thing in the morning -- a different board but cut from the same section of the same tree – and began making new panels.
But this time I avoided the rotten section and was able to cut strong, solid panels that were easily as pretty as the original set, but had no worm holes, rot, or strength issues.
And because I had just gone through the process of making the original panels, I was able to do it quickly and without stress.
By the end of the day I had beautiful new panels that were cut to size, sanded, shaped and ready for shellac.
Here are the new panels after treatments of shellac and wax, ready to become doors.

The experience reminded me that sometimes a mistake, or an apparent unexpected setback in a woodworking project, can force the maker to take a step back, reconsider his plans, and sometimes come up with a much better approach.

That’s what happened this time, and I’m pretty happy about how it all turned out.
Here are the panels glued-up in the frames. Their positions will be reversed on the actual cabinet, with the live edges on the outside edge of each door.

Wednesday, October 2, 2013

Inspiration Comes Full Circle and How Furniture Can Capture the Heart


James Krenov used to say that when someone falls in love with a piece of furniture, they’ll do anything to own it -- re-mortgage their house, sell their first-born – whatever it takes. They have to have it.
I guess that’s what a fine woodworker has to depend on if they’re going to survive. When a piece takes weeks, even months to complete, it needs to sell for a decent price if the craftsman who made it is going to be able to survive.
As it turns out, it’s not only ‘customers’ who can come under the spell of a piece of furniture.
Recently, one of our instructors at the College of the Redwoods, David, shared with us a mock-up for a chair he is building.
David said he hasn’t built much in recent years, and his creative bent has been fulfilled by helping us students get started on our own projects and careers. And he helps us immensely every day, from showing us how certain tools work, to parting with precious pieces of lumber he has collected over the years, to simply looking at a problem and saying “here, try this.”
But before he got into showing us his chair mock-up, David told us about one of the exceptional alumni at the school, Sarah Marriage (mentioned in an earlier post here), and showed us photos of some of her projects. She made some truly inspiring, beautiful pieces.
After going through the slides, David showed us a writing desk Sarah had built, and said he had fallen in love with it as she designed and built it in the shop at our school.
“So, I decided to save her the trouble of shipping it off to a gallery, and bought it from her myself,” he told us.
What a compliment. Anyhow, the writing desk has sat in his home for several years, but without a chair. Recently he was stirred, came up with a design, and began putting the model together.
David was inspired by the work of a student, and I, and others, were inspired by the realization that even someone who has seen literally thousands of pieces of beautiful furniture come through the school, could still be captivated by the simple lines contained in a writing desk conceived and built by a student.
Amazing.

Wednesday, September 25, 2013

Krenov on making furniture for 'Those People'


Just wanted to share something I read recently by James Krenov, about what he calls ‘Those People’ and the notion that fine woodworkers often struggle with making furniture for the very rich – because they are among the few who can afford it – and how that isn’t always a pleasant circumstance.
Here are his thoughts on that:
“Traveling reminds me again that there is little or no connection between wealth and that thing called good taste. Nor does money make someone a better person, or a worse person either. What it probably amounts to, for some of us at least, is that we are doing honest work, out best, with feeling in it, and we hope to meet people who will appreciate and want it. Some poor people with whom we get along very well will understand and say that they are sorry, but….
“Another person, of modest means perhaps, might ask to pay a bit at a time, and something tells us to trust him or her. Wealthy people come and ask the wrong questions and we feel so uneasy that some of us just do not care to let them have the piece, But there are also some with money and taste and a simple warmth that gets through our ‘those people” filter: we enjoy telling them about our work, they listen – there is contact, a kind of understanding.
“Nothing else matters, really. It is all about people…the only qualification being that they are the kind of people who do not make us unhappy at our work or about our work – this is vital.” – James krenov (The Impractical Cabinetmaker)
I just liked those words and the sentiment behind them. Hope you do too.

Tuesday, September 24, 2013

How To Turn a Sow's Ear Into a Silk Purse

My 'sow's ear,' right, and the frame and panel clamped together for glue-up, to the left.
There’s an old saying that goes like this: ‘You can’t turn a sow’s ear into a silk purse.’
I always liked the expression because it’s so visual, you can’t help but picture the process of trying to do just that, and the grotesque, inevitable end result.
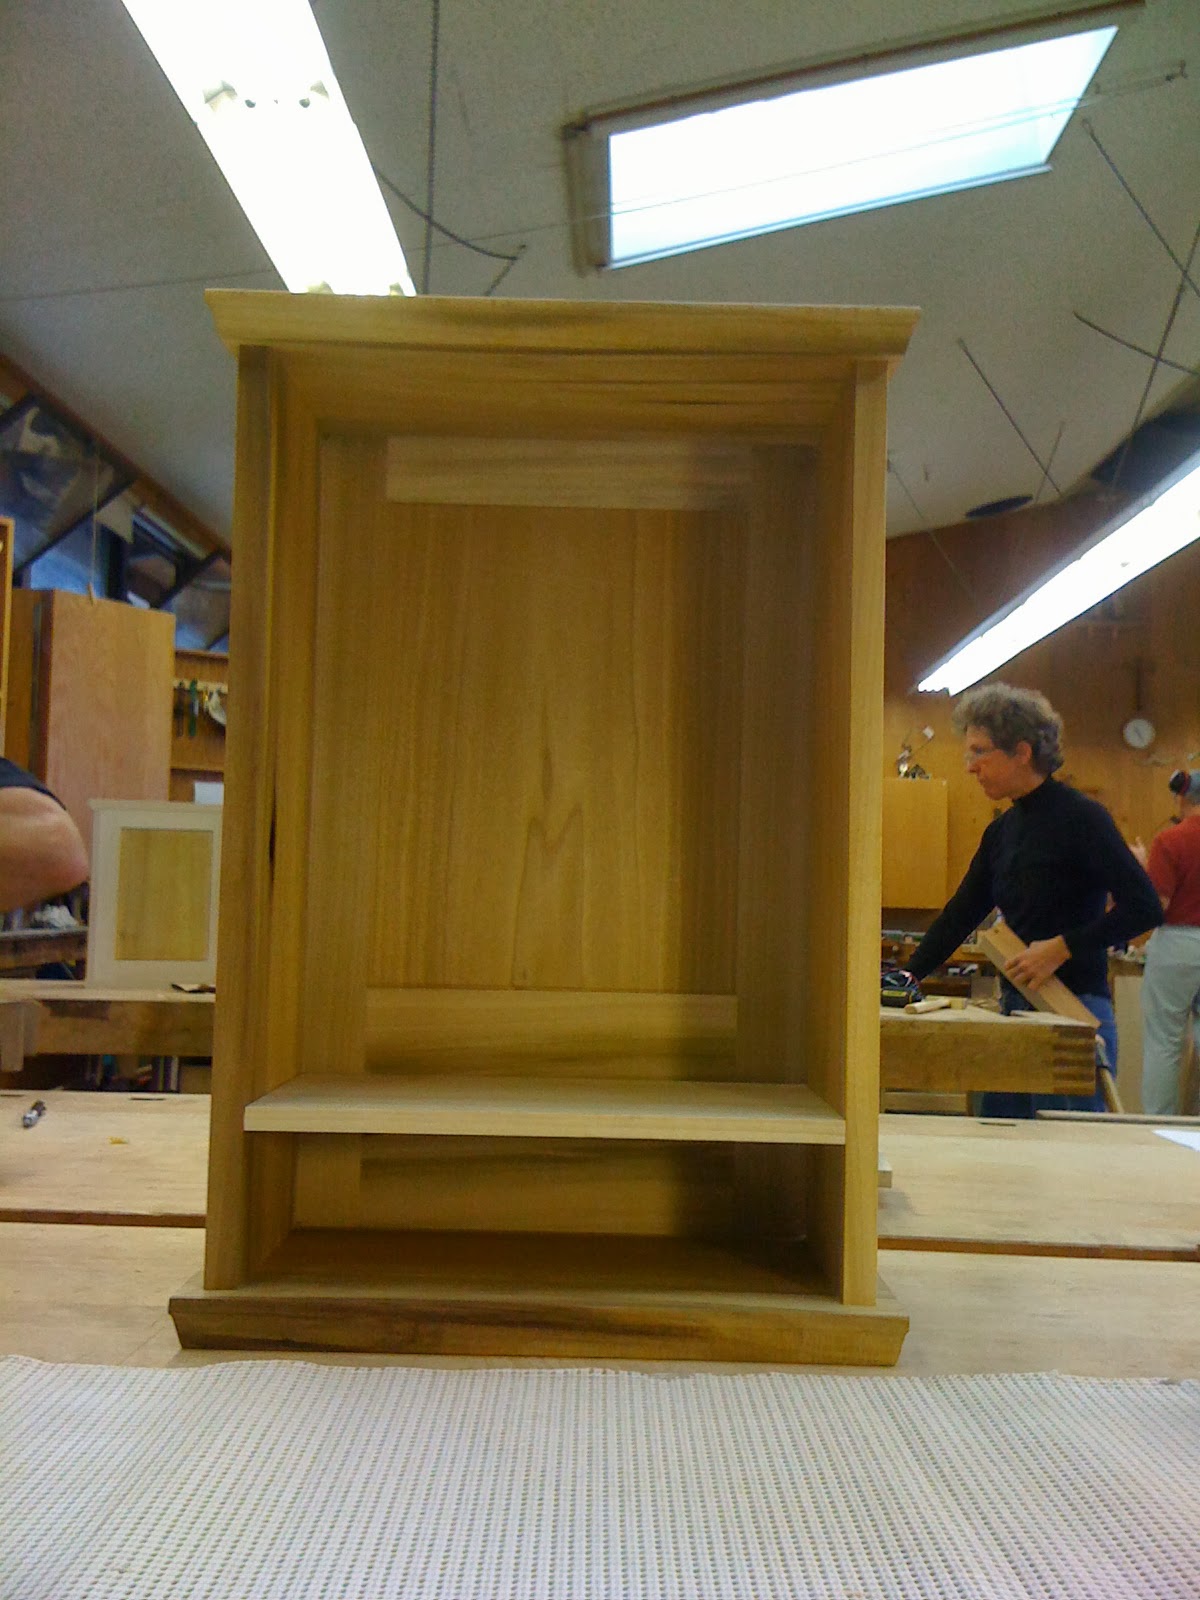
Our last assignment before moving on to our first major project was called the ‘Sow’s Ear’ exercise.
We were given a big chunk of poplar – an inexpensive, generally unattractive wood most people consider to be ‘paint grade,’ and given a list of smaller boards to mill out of the thick, heavy plank.
Then, we surfaced the wood, made our final cuts, and prepared to join the pieces into a cabinet, starting with the frame – essentially two sides and a top and bottom, joined together with dowels.
Once that was done, we constructed a frame-and-panel for the back of the cabinet, and decided on design elements such as shelves and doors. Some students even decided to make drawers.
Essentially, the assignment was meant to pull together a bunch of the skills we had learned, teach us some vital new ones, and give us the experience of building a complete piece from start to finish, before moving on to the real thing.
It was a lot of fun, but also stressful. We’re lucky enough to be enrolled at one of the more esteemed and well-known woodworking schools in the U.S., and the pedigree here is high. A lot of incredible woodworkers have come through here and made names and successful careers for themselves. Most of us want to do that too.
As a result, there’s a general desire among people here to do everything well. Which is where the name of the exercise comes from. Even though this is essentially just practice, many of us stressed over our little cabinets, lost sleep, spent days struggling with certain details. All in an effort to turn a sow’s ear into a silk purse – something we all know is impossible.
But anyway, in the end, though it’s made with cheap, unattractive wood, there’s something about this little creation that makes me happy, looking at it sitting beside my workbench.
Maybe it’s because it represents another step in this journey of becoming a woodworker, and the process of accepting that the struggle towards perfection is sometimes enough.
The final product!

Tuesday, September 17, 2013

Coopering -- Or how flat surfaces become round

I continue to be amazed by what can be done with wood when the proper tools and techniques are used. The latest thing to blow my mind is coopering.
The word comes from the name for barrel-makers because it incorporates some of their techniques for creating curves with wood.
It’s really simple. You figure out the curve you want and sketch it on a piece of paper. Then you take a flat board and mark it out in sections to be cut lengthwise, typically with smaller pieces (they’re called ‘staves’) near the outside, and wider ones in the middle.
Then you cut the staves out of the board, rearrange the pieces along the curve you want. Then you cut the edges of each board on an angle to create the curve, and rejoin them together with glue.
Benchmate Jim glues up his coopered door. The process takes time as only two or three staves can be clamped and glued at a time. The mating edge of each individual piece has been cut on an angle, or bevel, to make the curve.
And boom, you have the rough beginnings of a curve.
Of course at this stage the board is still faceted with the flat surfaces from each of the individual staves, and needs to be planed down with a round-bottom plane on the inside, a smoothing plane on the outside, then scraped and sanded until a perfectly smooth curve is achieved.
Using my round-bottom or coopering plane to turn the flats into curves.

But when it’s complete, it’s a beautiful thing. And when it’s done properly, the boards repositioned so the grain matches up, it almost looks as though it grew that way or was carved out of a solid piece. Amazing!
The finished board, ready to be hung as a door on a small cabinet!